Showing posts with label DIY. Show all posts

Tuesday, July 1, 2014

DIY Patriotic Door Hanger

When can you be more American than a World Cup Game and the 4th of July all in one week????

..Exactly what I thought!

You need to show your pride anywhere and every where you possibly can...

so why not include your front door!
Supplies needed -
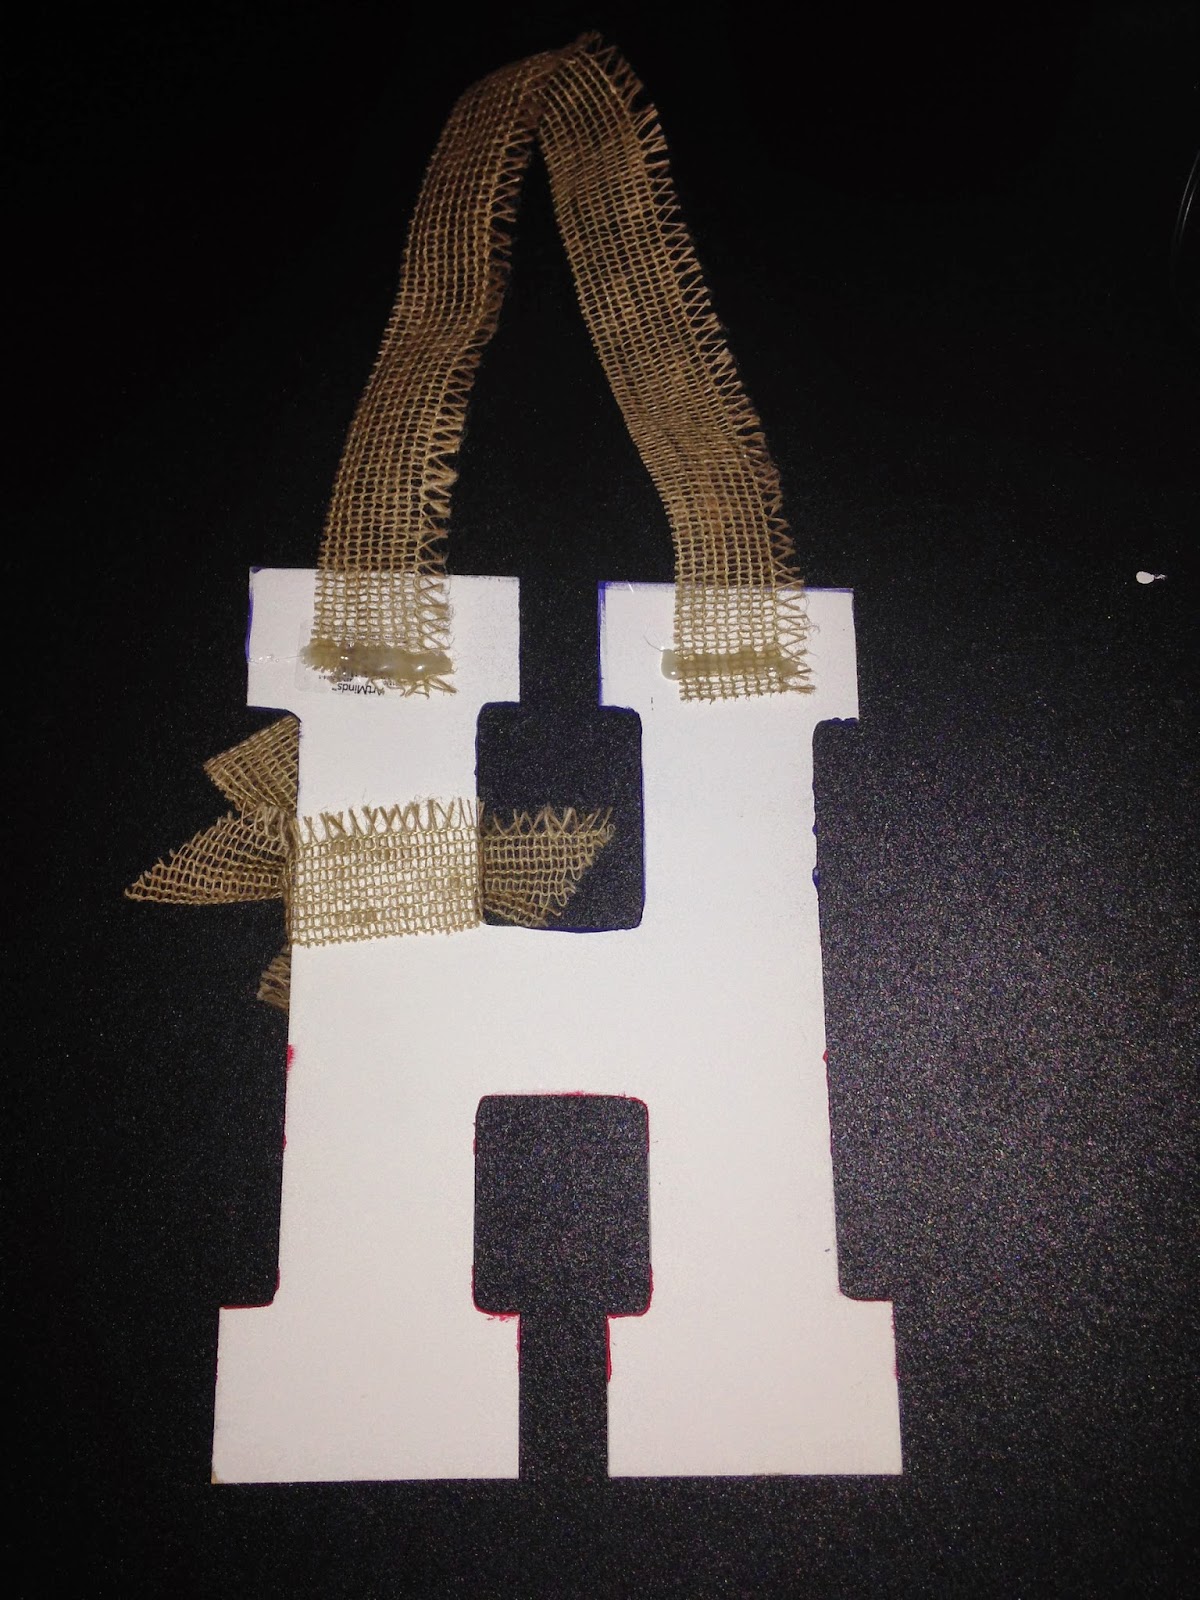
Wooden Letter - Michaels
Paint - Navy and Red
 Painters Tape
Star Stencil
Paint Brush
Burlap (not pictured)
I marked off the red and white stripes with painters tape.  It was easier for me to just have the stripes be 2 rows of blue tape thick - and I started half way down my letter.

Add caption


Unfortunately part of the painters tape pulled the original white paint off of the letter - I had to go back and touch up the white


I used a stencil to trace the white stars 


Hot glue the burlap to the back of your letter

Tie a bow around it and you are good to go!


Place your hanger on your front door proudly!

Happy World Cup Day and 4th of July week!!!


Wednesday, February 13, 2013

Happy Valentines Day

Happy Valentine's Day Loves!

I thought I would spread the love to my co-workers on this lovely holiday.

A little sweet treat served in a cute little mason jar...
...whats not to love?

I first made all the mason jars.
I got doilies from the dollar store, the butcher twine from HomeGoods, and scrapbook paper from Michaels.
I glued the red heart onto the doily, and then wrapped the butcher twine around the mason jar and tied it in the back.


Cupid's Chex Mix

8 cups Rice Chex
4 cups broken Pretzels
2 cups M&Ms
2 cups peanuts
2 bags of white chocolate chips

Mix rice chex, pretzels, M&Ms and peanuts all together.  Melt white chocolate.  Pour white chocolate over the mixed dry ingredients in a bowl.  Completely coat the chex and spread out on wax paper to let cool.  Once cool, break into smaller pieces and serve.

I hope you have a wonderful valentines day!


Photobucket

Thursday, January 24, 2013

DIY Thread Holder


The other day I needed to sew a pair of pants.. which prompted me to look for black thread..
.. which I found in a TANGLED mess in a ziplock baggie that I have used to hold my thread since my mom got me a sewing kit in college, 12 years ago.  {My dad got me a tool box and tools as a dorm room gift and my mom, a sewing kit! and I still use both to this day!}

So I saw this idea on pinterest to make a thread holder... I was determined that maybe by making this.. it would motivate me to clean up the rest of the craft room.

I went to home depot and picked up the following

A piece of scrap wood {I got this piece for $1.01 pre cut}
Stain
Picture Hanging Kit
Cinder Block Picture Hanger


First step is to stain your board
Then I started to tape of the chevron print.  I thought I could do this by hand

but then my OCD got the best of me and I decided to draw a grid on the board and use that as reference points to create my pattern

Then I painted the board white


The hardest part for me when doing a project like this is waiting for it to dry so I can see the results.  I painted this late night, and I didn't have time in the morning to pull back the tape.  Well that evening while I was at work at the golf course, I got a text message from Justin saying that they board looks really good.. he took some of the tape off.. EXCUSE ME? my hard labor.. I told him that he needed to stop so I can do the rest! Ha! {Territorial over my projects much?! whoops!}
 Then when I got home I was able to do the rest of the reveal myself.

Next steps is to use nails and hammer in at an angle where you want your thread to be.  Make sure to put them at an angle or else the spools could potentially fall off.

 I then attached picture hooks and picture wire to the back of the board so I could hang it in the basement.  I bought a kit at Home Depot.

 I then found a picture hanger in the wall hanging section that you could just hammer right into the cinder block {music to my ears that I didn't have to use a mortar bit again.. those things are intense!} and just like that my project was hung on the wall.


After making this project, I realized that it might not necessarily be the amount of thread that I have, but the size of the mess that gives me the most anxiety! Hopefully my ribbon obsession won't turn into a thread buying obsession as well!

Happy Thursday!


Photobucket

Wednesday, January 23, 2013

DIY Craft Room.. On a Budget

Think back before pinterest, and blogs of where you used to get ideas for decorating?
Magazines... {blasphemy.. i know they are so 4 years ago}
However, one day as I was going through a magazine, I came across a work station that I fell in love with, that I knew I needed to recreate for myself.

It had an oversized bulletin board that acted as an idea board {yes remember.. prior to pinterest}, with bright colors, and a usable space.  

I had an old table from college {yes the same one that Aly and I probably had many of late night nachos on from Taco Bell} and I decided to give it a facelift by sanding it down and painting it.

Secondly I went to the hardware store and bought a piece of particle board that was big enough to make a HUGE bulletin board.  I then used gorilla glue to attach pieces of cork, covered the cork with fabric, and framed it with trim.  With the help of Justin's dad, we were able to hang this bad boy on the wall.  {and when I say help of Justin's dad.. I really mean Jeff went to work with his electric nail gun and I just watched my vision come to life!}
I also took this chair from my grandma's house when we did the great large overhaul from moving her from a house to a condo a few years ago.  I kind of felt badly taking one chair from a set of 4 but she said I could.. so I did.  I recovered the base to correspond with the fabric on my bulletin board just using a staple gun.


So the basis of this craft table and bulletin board completely came together probably almost 2 years ago.  .. so why am I just now blogging about it?

Well you see, the craft table was very similar to some peoples at home treadmills/elliptical... a catch all for EVERYTHING.. clothes that needed to be hung to dry, extra fabric that I have bought too much of for a project, a bazillion spools of thread {which I later find out is not nearly a bazillion - more just a mess of unwound thread!}.. this weekend I decided that I was going to clean off my craft table, bust out some projects that I left unfinished and become productive.

First item of business.. Clean up this mess!

{Do you want to play eye spy from this picture?? Erin Condren stickers, 3 things of scotch tape, a golf club, about 10 baby outfits that were never given as gifts.. yes trust me it gives me anxiety looking at it too.. hence why I never tackled this damn room.. and avoided doing laundry because the washer and dryer are diagonal from this table}


I had purchased two curtain rods from Ikea a few years back, thinking they could potentially be useful for ribbon.  While in the store I envisioned them going horizontally, like a normal curtain rod, however when I got them home, I realized there was no where to put them horizontally, so I decided to find a stud in the wall and hang it vertically.  It works wonders.  I put straight pins at the end of all of my ribbons, so when I need one, I just pull the end of one ribbon.. the rest spin on the rod, but don't unravel.  This weekend though, I finally got around to putting up the second rod.  {and much to my chagrin, I realized that there were no more studs in the wall.. had to think outside the box, use anchors, and then screw in the fixtures from there.. I was feeling quite empowered by the time I had finished this project!} And yes, I'm fully aware, I have a small obsession with ribbon.

Next up.. organizing my fabric.  Apparently its not normal for someone who really doesn't use their sewing machine as much as they would like to have this much extra fabric.  My mom and sister informed me this weekend that I should try buying less fabric for projects... My response, have you ever stood in line at Joann's on a Saturday waiting for fabric to be cut?  Yea, thats what I thought, the last thing you want to do is turn around and go right back in to get more fabric!

I had always envisioned a cubical organizer downstairs.  Maybe replacing this shelving unit that I wrote into the contract when buying my condo.  But then that just seemed silly.  Why replace something that holds my cleaning supplies, detergent, and paper towels {yes I buy those in bulk, just like ribbon!}

My mom and I bought this 25 cube thing from Target when I first moved in nearly 6 years ago.  I had just never put this one together {we bought two, the other one holds my flip flop collection.. is collection the right term?}  I assembled this bad boy as well, and then started folding up and organizing my fabrics.  My aunt gave me this ENJOY sign as part of my housewarming gift and I finally have a perfect spot for it.  I might just need a spray paint and we will be good to go.


My other project I completed this weekend was this thread holder.  I will have a DIY up on tomorrow on how I went about making this.  

So now that I have this space cleaned up and ready to go.. who wants to find projects to make? Sewing? Crafting? Anyone?

Happy Tuesday friends, and thank you so much for the warm welcome back yesterday, I'm so happy to be back into a routine!! 


Photobucket

Thursday, December 15, 2011

Getting into the Christmas Spirit

With the holiday's quickly approaching, we decided to get together this week with Molly and her family to celebrate.

My favorite little almost 2 year old
Although her and her brother received a few toys from Justin and I
we also got a little crafty this year with their gifts

With this as my inspiration
and a matching bib for her brother

along with Molly's shirt, I had her a tutu made from one of my friend's Megan
that is red and white so it will match her shirt and work for her birthday party that is Mickey Mouse Clubhouse themed.

Molly got me an amazing necklace that I had pinned a long time ago from Vestique
{consider this your fair warning - vestique can be a dangerous website! everything is reasonably priced and ADORABLE! i kind of think of it as a less expensive francesca's}

I have had some trouble getting into the Christmas spirit this year {even though I have been listening to Christmas music since November 1st, and my tree has been up shortly after that} but hearing Molly say "Ho Ho Ho" when you ask her what Santa says, made me excited for the season. She truly warms my heart more than she even knows!


Photobucket

Monday, November 14, 2011

weekend recap - a wedding an a pinterest craft

We were were rather busy this weekend.

Friday night we started out with one of my college best friends from college weddings. 11-11-11 was one busy day for weddings - we saw several just in our hotel, as well as the reception venue.

Mr. and Mrs. Wenning
Justin and I at the reception

myself, Brandy and Aly
{the 3 of us were roommates in college}
Their first dance
I love all the W's everywhere
Saturday morning we drove up the road for Justin to play golf with Jimmy and Jess and I went outlet shopping. Although we weren't completely successful in shopping, we were able to come back to their house and craft.

I saw on Pinterest the ruffle tree skirt that everyone was pinning. I decided to take on the challenge of this craft!
Lets just say when the tutorial calls for snacks - they weren't kidding.
After 20 hours of working on this darn thing {and thats even cheating by using a sewing machine to make the ruffles rather than glue gun} I have a finished product for the basement!

Our basement is scarlet and gray {for our BELOVED buckeyes} and I plan on tying in the aqua blue for the holidays. {and please don't mind the fact I brought the tiny little tree upstairs to take the picture}


That was our weekend in a quick little recap. I hope you had a great weekend as well!


<span class=Photobucket" border="0" src="http://i1212.photobucket.com/albums/cc449/blueluxstudio/LindseyH/LindsH_Sig.png" style="border: 0pt none; margin: 0pt; padding: 0pt;">

Monday, October 31, 2011

HAPPY HALLOWEEN!


from a few of your favorite apps :)
Friday night Justin and I got to spend time with 2 of our favorite little munchkins!
Molly painted pumpkins
{yes in the bathtub... i didn't know where else to have a 20 month old paint a pumpkin in my little carpeted condo}

but truthfully, I think her favorite part of painting was cleaning up and playing in the water
while molly painted her pumpkins - Domingo just chilled! He is such a good baby!
and we also made this cute little canvas for Katie and Jason
I hope you had a wonderful Halloween!

next up... Thanksgiving {which makes it that much closer to CHRISTMAS!}

post signature