Showing posts with label Crafts. Show all posts

Tuesday, July 1, 2014

DIY Patriotic Door Hanger

When can you be more American than a World Cup Game and the 4th of July all in one week????

..Exactly what I thought!

You need to show your pride anywhere and every where you possibly can...

so why not include your front door!
Supplies needed -
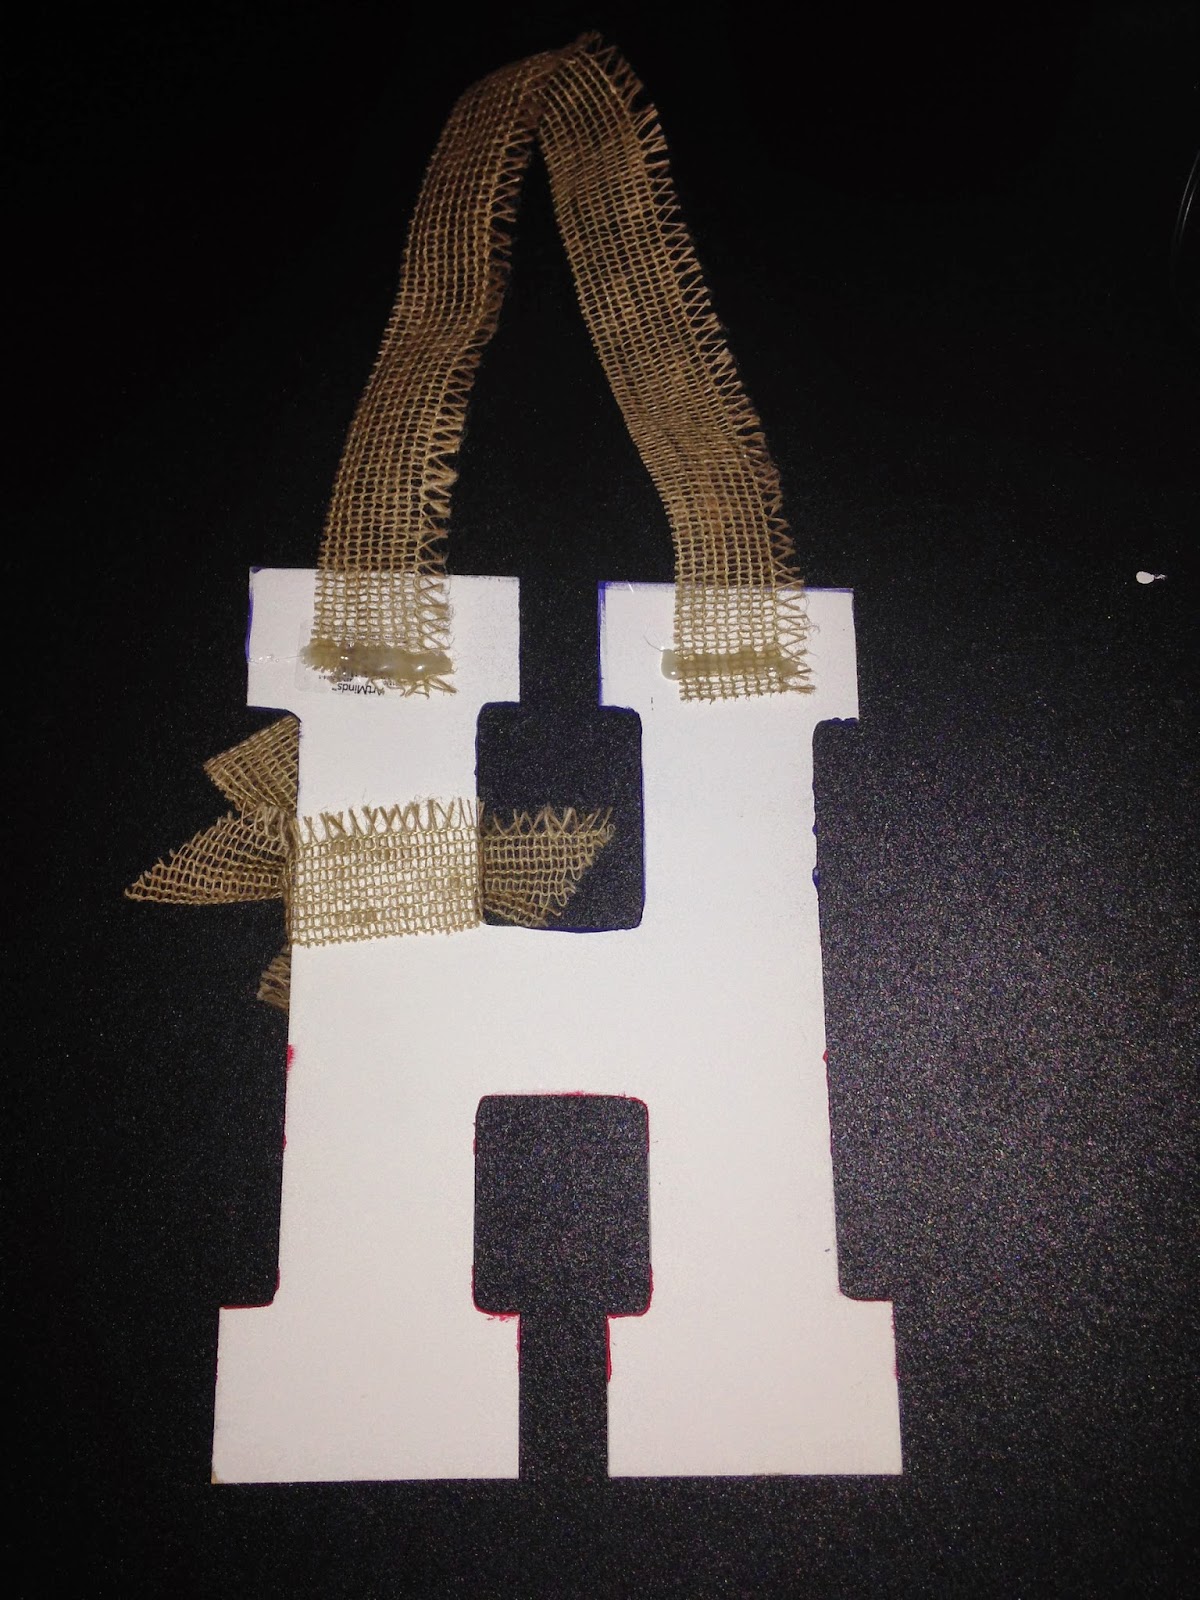
Wooden Letter - Michaels
Paint - Navy and Red
 Painters Tape
Star Stencil
Paint Brush
Burlap (not pictured)
I marked off the red and white stripes with painters tape.  It was easier for me to just have the stripes be 2 rows of blue tape thick - and I started half way down my letter.

Add caption


Unfortunately part of the painters tape pulled the original white paint off of the letter - I had to go back and touch up the white


I used a stencil to trace the white stars 


Hot glue the burlap to the back of your letter

Tie a bow around it and you are good to go!


Place your hanger on your front door proudly!

Happy World Cup Day and 4th of July week!!!


Tuesday, March 15, 2011

DIY St Patty's Day Project

I know that Molly is the luckiest little 14 month old ever...
but I needed for everyone at her daycare to know how lucky she is as well

so I made her something to wear on Thursday

Supplies Needed:
Shirt/Canvas Bag/anything cloth
Freezer Paper
Fabric Paint
Sponge Brush
Iron
Pencil
Scissors
via
Trace your design onto your freezer paper

Cut out the area of the freezer paper that you want to paint
[basically you have created a stencil]

Iron on freezer paper
[shiny side down, make sure all areas are secured very well {to avoid any bleeding onto the shirt}]

Apply paint liberally
[I would recommend putting a piece of cardboard or a magazine in between the middle of the shirt/tote bag/ect so the paint doesn't bleed through to the back]
Wait for the paint to drive
And pull back the freezer paper
Remove all of the freezer paper
I used puffy paint for the heart [yes, it totally brought me back to my sorority days, making shirts for every occasion possible!]

I applied the glitter to the shamrock with fabric glue for glitter
The hardest part of this whole project was waiting for the glitter to dry to see the final project
To pass the time I made a bow to match and then removed the excess glitter

The funniest part of this entire project was when Justin brought up a load of clean laundry that Molly's shirt happened to be washed in

he came up with the laundry and said

well the load is done but we have one slight problem....

I think I shrunk a shirt - ha!

Were not used to things this small being in our laundry

Happy Crafting!


post signature

Tuesday, October 26, 2010

Top 2 Tuesday - Halloween Crafts/Decor/Party Ideas AND a New Blog Design

Top 2 Tuesday

Halloween or Fall crafts/decor/party ideas

I have done a few DIY projects this year for Halloween
[for some reason I was totally into doing a few DIY projects this year]

1. Polka Dot Pumpkins
I used a carvable pumpkin so I only had to do this project once -rather than once a year
To carve the pumpkins - just use an apple corer [careful because if you push to hard you will have a MUCH larger hole than just the corer - let me tell you I can speak from experience!]
i put marks on the pumpkin to where i needed to punch holes
and i cut a hole in the bottom of the pumpkin and inserted a battery operated tea light

2. Young Trick-Or-Treaters Treat
i used a drill and made holes and then inserted into all of suckers
i once again used a carvable pumpkin so I can re-use this next year

OTHER DIYS
a boa wreath - an inspiration from a target wreath
EEK picture frames
candy corn cupcakes

now head on over to Taylor's blog to check out other bloggers Halloween Crafts/Decor/Party Ideas

ALSO
i'm sure that you have noticed - i got a blog make-over
Lauren at Blue Lux re-did my blog and she did an AMAZING job
She was amazing to work with, fast, approachable, quick to get back to you, open to any suggestions that you might have, affordable AND she is beyond talented!
I would HIGHLY recommend working with Lauren - she is wonderful :)
Thank you again Lauren!!!

Also, another reminder - tomorrow is your last day to sign up for the $35 CSN Giveaway

post signature

Saturday, July 31, 2010

Preperations for the Golf Outing

Happy Saturday!

I feel like i have been a little MIA the past few days but I have been busy doing things for a golf outing that is today! [clearly you can tell that i'm not too overly stressed about it since I am sitting here updating my blog when I should be getting ready - priorities - right!?]


So over the past few days I have been making these:

And putting the finishing touches on this


I am so excited for today's golf outing - it should be a lot of fun!

Here are the recipes that we used for the pudding shots...

**a little hint when making jello shots/pudding shots - spray all of the cups with PAM/cooking spray first - that way the shots come right out**

Buckeye Shots

**I only made 1/2 of this recipe**


2 packages of instant chocolate pudding (small box)
1 qt whipping cream
16 oz of baileys
12 oz butterscotch schnapps

Combine pudding and whipping cream
Pour in Bailey's and Butterscotch Schnapps
Ladel into jello shot cups
Freeze
Serve with mini plastic spoon
you can find the spoons at GFS along with the cups and lids


Mudslide Shots

1 small box of instant chocolate pudding
1 3/4 cup of cold milk
2 oz Kahula
2 oz Bailey's Irish Cream
2 oz Creme de Cacao
Add liquors to cold milk, pour this into pudding mix, blend thoroughly, pour into cups and chill


Drunk Gummies


3 shots of Absolut Citron
1 bag of Haribou Gummies


Refrigerate Gummies! Let the Gummies sit in the Citron for 2-3 days and soak up all the liquid [aka alcohol] and then enjoy! even Justin [the kid who doesn't like anything gummy enjoyed them!

Tuesday, December 15, 2009

Not so thrifty Tuesday

So i totally know that I have been slacking lately.. and i apologize, I would like to make up excuses like its the craziest time of the year - but that means I should be full of good things to share with all of my friends - right?! well tonight was no exception, I had my departments work xmas party, went to the mall to pick up xmas gifts for JM and my sister, and then came back and wrapped all of my gifts... and that leaves me here tonight at 10:40 trying to come up with a blog post...

I did however see a really neat craft idea that I am hoping to make within the next week or so. My VPs assistant showed me something that she had received from a from a friend and you will need the following products

A 1'X1' piece of slate (as smooth as possible)


Paints
I haven't actually gone to the store and looked at my options for paints, however from what i read online Apple Barrel Paints would work, and would be non - toxic, however I want to do my own research as well.
Cheese Spreader
You can use plain cheese spreaders or you can get fancy ones to match your plates

Chalk
Felt Feet

What I envision doing is painting the letter of the couples last name in the middle of the slate, or if its for hosting a party I could always do something to match the kitchen of the host (with either polka dots - because I am crazy about polka dots or doing something relative to the seasons). Once your paint has dried add felt feet to the bottom of your piece of tile, so it doesn't scratch the counter of the receipent.
After everything has dried, you will tie up the chalk and the cheese spreader with a piece of ribbon (polka dot of course - ha!) and voila - you have a perfect holiday gift of a hostess gift that is unique and original. Here is something that looks similiar to what I was envisioning - however once your personalized twists are added it will be WAY cuter! (<--- and yes I know thats not a word, however I'm super tired, and I my brain has turned off!) As soon as I find time (and energy) to make one I will SURELY post it!

Monday, December 7, 2009

Thrifty Tuesdays - Cookie Exchange Containers

Every year in the office we do a cookie exchange, and although the cookie part is supposed to be the exciting piece of the exchange, there is a bit of a "challenge" to see who can have the most creative presentation. Well I'm quiet excited about my contribution this year for my containers. Not only is it thrifty, but its pretty darn cute if you ask me...


Here is all you need (Plus Soup Cans)

I measured each piece of scrapbook paper, based on the size of the can and then cut to the correct size

I kept each piece separate and in their individualized cans because the cans are not all the same size

After cutting all the paper to the exact size, I had a lot of left over paper that I could use to decorate the cans

And then I just used a glue stick to attach them to the big piece of paper to make each can design different

I used a glue gun to attach the paper to the tin can


And voila - the finished product


I will place the cookies in the cans, and then wrap the entire fan with cellophane and tie it with a coordinating ribbon. I will post a picture when I complete the project Wednesday night.

The best part about this project is that it took me less than a 1/2 hour to create, it was fun and the entire thing cost me $2.64 in scrapbook paper - much cheaper than buying individual containers!